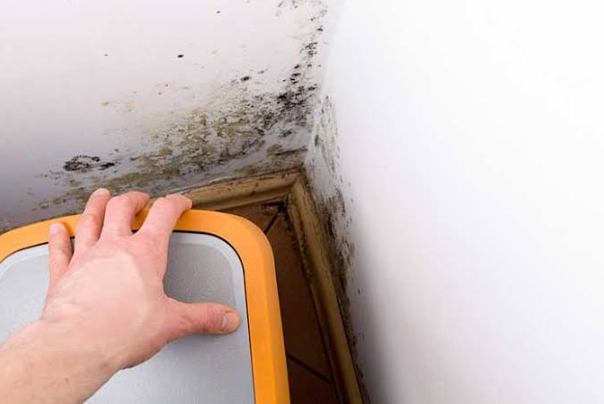

Inspectors find hidden mold by tracing moisture, checking signs of water damage, and examining areas where growth may be concealed. They use visual inspections, moisture meters, humidity readings, and sometimes thermal cameras or small inspection cameras. When sampling can answer a specific question, they may collect material, surface, or air samples for laboratory analysis.
No single tool detects every hidden mold problem. A thorough Mold Inspection in Long Island combines the home’s history with physical evidence. The goal is to identify affected areas, investigate the moisture source, and explain what needs further checking or repair.
A clean-looking wall does not reveal everything behind it. However, a musty smell or water stain does not automatically confirm mold either. Inspectors work through those clues before drawing conclusions.
Why Mold Can Grow Where You Cannot See It
Mold can develop on concealed surfaces when moisture reaches materials that support growth. The back of drywall, wood framing, carpet padding, and enclosed plumbing spaces can remain damp while exposed surfaces look dry.
The EPA identifies several possible hidden locations, including behind wallpaper and paneling, beneath carpets, and inside pipe chases. Moisture trapped beneath certain wall coverings can also support growth. Investigating these spaces requires care because disturbing contaminated materials may release spores.
For example, a plumbing leak may wet the inside of a wall before a stain appears in the room. Repainting the stain changes its appearance but does not establish whether the concealed materials have dried.
This is why inspectors investigate how water entered and where it traveled. Finding the moisture path helps them decide which areas deserve closer attention.
See also: How Handbag Straps Extend the Life and Versatility of Your Bags
Step 1: Review the Home’s Water Damage History
The inspection usually starts with questions. Your answers help the assessor focus on likely trouble spots and understand conditions that may no longer be visible.
Useful details include:
- Previous leaks: Explain which pipes, appliances, windows, or roof areas leaked and whether repairs stopped the problem.
- Flooding or backups: Identify affected rooms, damaged materials, and any drying or replacement work.
- Recurring odors: Describe where the smell is strongest and whether it changes after rain or during certain seasons.
- Past repairs: Share information about replaced drywall, flooring, insulation, or earlier mold cleanup.
- Current moisture concerns: Mention condensation, damp storage areas, or rooms that remain humid despite normal use.
Photos, repair records, and insurance documents can help establish what happened.
During a Mold Inspection in Long Island, explain concerns about the whole affected area, including spaces next to or below the original leak. Water does not always stay where it first enters.
Step 2: Examine Accessible Areas for Physical Clues
Inspectors then examine accessible surfaces and building spaces. They look for visible growth, staining, damaged finishes, and patterns that suggest past or current moisture.
An inspection follows the evidence. A stain below a bathroom may lead to checks around plumbing and nearby ceiling materials. An odor near a closet may prompt examination of the adjoining exterior wall.
Common clues include:
- Peeling paint or wallpaper: Moisture may be affecting the surface or the material beneath it.
- Swollen trim or cabinets: These changes can help identify areas that have absorbed water.
- Stained ceilings or walls: The shape and location may help trace a leak, although staining alone does not prove mold.
- Damp flooring: Inspectors may investigate nearby plumbing, exterior openings, or moisture beneath the floor.
- Recurring musty odors: These justify further investigation when the source is not visible.
The assessor documents what they actually observe. Dust, soot, staining, and mold can look similar, so appearance must be interpreted carefully.
Step 3: Measure Moisture in Building Materials
Moisture meters help inspectors locate damp materials that may deserve further investigation. Depending on the instrument, probes contact or enter the material, or a sensor checks near its surface.
The EPA describes moisture meters as useful for finding wet areas and monitoring drying. They can support investigation of materials such as wood and wallboard.
Inspectors compare readings across relevant areas rather than treating one number as a complete answer. A different reading near a stain may help narrow the investigation.
A moisture meter does not identify mold. A high reading supports concern about dampness, while a dry reading describes conditions at the time of inspection. Neither result, by itself, establishes what happened during an earlier leak.
Step 4: Use Thermal Imaging to Locate Suspicious Patterns
A thermal camera displays surface temperature differences. Under suitable conditions, moisture can create patterns that help inspectors decide where to take additional readings.
However, thermal cameras cannot see through walls. They detect temperatures on the visible surface, not mold colonies or objects inside the wall. Equipment manufacturer FLIR explains this distinction in its guidance on thermal imaging.
Why Thermal Findings Need Confirmation
A cooler patch may relate to moisture, missing insulation, airflow, or another building condition. It is a clue that needs checking.
FLIR advises using a moisture meter to verify suspected moisture patterns because a temperature difference does not guarantee water is present.
An inspector may therefore scan a ceiling, identify an unusual pattern, measure the area, and compare the findings with nearby materials. The combination provides more useful evidence than the image alone.
Step 5: Check Humidity and Condensation
A humidity meter measures moisture in the air. This helps inspectors investigate conditions that may support dampness even when they cannot find a plumbing or roof leak.
The EPA recommends keeping indoor relative humidity below 60%, ideally between 30% and 50%. Humid air can also condense when it contacts cold surfaces, creating local moisture problems.
Inspectors may examine bathroom ventilation, cold pipes, window condensation, or poorly ventilated storage areas.
One humidity reading does not describe every season or room. The assessor should consider when the reading was taken and whether your concern appears only during certain conditions.
This matters when a basement smells musty in summer but seems dry during a cooler inspection day.
Step 6: Examine Concealed Spaces When Access Is Needed
If evidence points behind a wall or beneath another surface, the inspector may recommend closer examination. This can involve existing access panels, a small inspection camera, or a carefully planned opening.
Borescopes and Small Inspection Cameras
A borescope lets an inspector view a limited concealed area through a small opening. The EPA identifies this tool as one option for examining behind walls without extensive damage.
Its view remains limited. Framing, insulation, and the camera’s angle may block sections of the cavity. A clear image of one spot does not establish that the entire wall is unaffected.
When an Opening May Be Necessary
Sometimes surface readings cannot resolve the concern. Direct access may be needed to examine suspect materials or determine the extent of damage.
Before proceeding, the assessor should explain:
- The reason for access: Which finding suggests a concealed problem, and what the opening could clarify.
- The proposed location: Why that section offers a useful view of the suspected area.
- Permission and responsibility: Who authorizes the work, creates the opening, and handles repairs.
- Dust control: What precautions are appropriate if contaminated materials may be disturbed.
- Other material concerns: Whether older finishes require evaluation before cutting or removal.
Opening walls is not a routine requirement for every inspection. It should follow a clear reason and an agreed scope.
Step 7: Collect Samples When They Will Add Useful Information
Sampling can support an investigation, but it does not replace inspection. The assessor should explain what each sample will help determine.
Surface and Material Samples
Tape lifts, swabs, or material samples may help distinguish suspected fungal growth from other substances. They describe the sampled location or material, not every surface in the home.
For instance, a sample from a stained cabinet cannot establish the condition of insulation inside a nearby wall.
Air Samples
Air samples collect airborne material during a particular sampling period. Depending on the investigation, the assessor may use indoor and outdoor comparisons to help interpret results.
However, a brief air sample can miss growth that is enclosed or not releasing much material during collection. NIOSH warns that short-term results, especially negative findings, may not represent actual exposures. It also advises against routine mold air sampling in building air quality evaluations.
When Testing May Be Unnecessary
The EPA states that sampling is usually unnecessary when visible mold is present. It also notes that no federal limits exist for mold or mold spores. A laboratory result therefore cannot prove compliance with a federal mold standard.
A useful Mold Inspection in Long Island starts with the building investigation and adds testing when it can help answer a defined question.
Where Inspectors Focus Their Attention
The inspection scope depends on access, the property, and the reported concern. Several areas often deserve attention when moisture evidence points toward them.
Basements and Crawl Spaces
Inspectors examine accessible framing, foundation areas, stored belongings, and finished surfaces. They look for signs of water entry, condensation, and materials affected by previous flooding.
A finished basement can limit visibility. Paneling and drywall may hide the foundation and framing, so the report should explain those access limits.
Attics and Roof Areas
The assessor checks accessible roof sheathing, framing, insulation, and areas near reported leaks. Staining can guide the investigation, but it does not establish whether a leak remains active.
The inspector may recommend further evaluation by a roofing or ventilation professional when the suspected cause falls outside the assessment scope.
Bathrooms, Kitchens, and Laundry Areas
Plumbing connections, cabinets, appliance spaces, and adjoining surfaces may show evidence of leaks.
If water escaped beneath an appliance or cabinet, inspectors consider whether nearby flooring or concealed materials also need checking. The affected area may extend beyond the visible stain.
What a Thorough Inspection Report Should Explain
A report should connect observations, readings, and any laboratory findings. It should distinguish confirmed findings from suspected conditions and explain where access limited the assessment.
Look for:
- Inspection coverage: Rooms and spaces examined, along with inaccessible areas.
- Supporting evidence: Photographs, relevant measurements, and sample locations.
- Moisture findings: Identified or suspected sources and any needed specialist investigation.
- Interpretation: What the evidence supports and what remains uncertain.
- Next steps: Recommended repairs, further investigation, or remediation planning.
New York’s Department of Labor explains that a mold assessor’s responsibilities include inspecting the property, identifying the moisture source when possible, and developing a remediation plan for covered projects.
The report should give you something practical to act on.
How to Prepare for a Mold Inspection
Provide access to the areas you want assessed and share the property’s leak and repair history. Ask for preparation instructions specific to the proposed inspection or sampling.
Do not paint over suspicious areas or remove materials simply to make the home look cleaner before the visit. Tell the assessor about recent cleaning, drying equipment, or repairs so they can interpret current conditions.
If you discover a fresh leak, address it promptly rather than waiting for the appointment. The EPA recommends drying wet materials within 24 to 48 hours to help prevent growth. That is a prevention guideline, not an exact countdown for every situation.
Frequently Asked Questions
Can an inspector find mold without removing drywall?
Often, inspectors can identify moisture concerns and narrow suspected locations without removing drywall. Confirming concealed growth or its extent may still require direct access.
Does a musty smell always mean mold?
No. An odor is a reason to investigate, not a complete diagnosis. The inspector should look for supporting evidence and consider other possible sources.
Can a clean air test rule out hidden mold?
No. A short air test cannot establish the condition of every concealed surface. Inspectors must interpret it alongside the building assessment and its limitations.
Who should perform a mold assessment in New York?
Hire an appropriately licensed mold assessor for covered work. New York regulates mold assessment and requires separation between assessment and remediation on the same property. Verify current credentials before booking.
Find the Moisture Source and Understand Your Next Step
Finding hidden mold requires a careful investigation, clear evidence, and honest limits. The assessment should explain what was found, where further access may be needed, and which moisture problems require attention.
For Mold Inspection in Long Island, Quest Environmental Testing provides independent mold inspection and testing services. We inspect and test without offering mold remediation, helping homeowners understand the findings before arranging cleanup or repairs. Contact our team to discuss your property’s moisture history and schedule an assessment.